Video Noise Reduction: Clean Footage in Minutes
Video shot at dusk, at night, or in poor light often ends up with pixel noise — crawling speckles and colored blotches that make everything look dirty. The good news: a quick denoise with simple video noise-reduction tools can make your video look clean and natural — no complicated editor required.
Why noise appears
Low light forces the camera to amplify the signal, and the random speckles get amplified too. Small sensors and strong compression make it worse. You'll notice two types: luma (gray grain) and chroma (colored dots). The goal isn't perfection - it's clean video that still looks natural.
How to denoise your video in practice
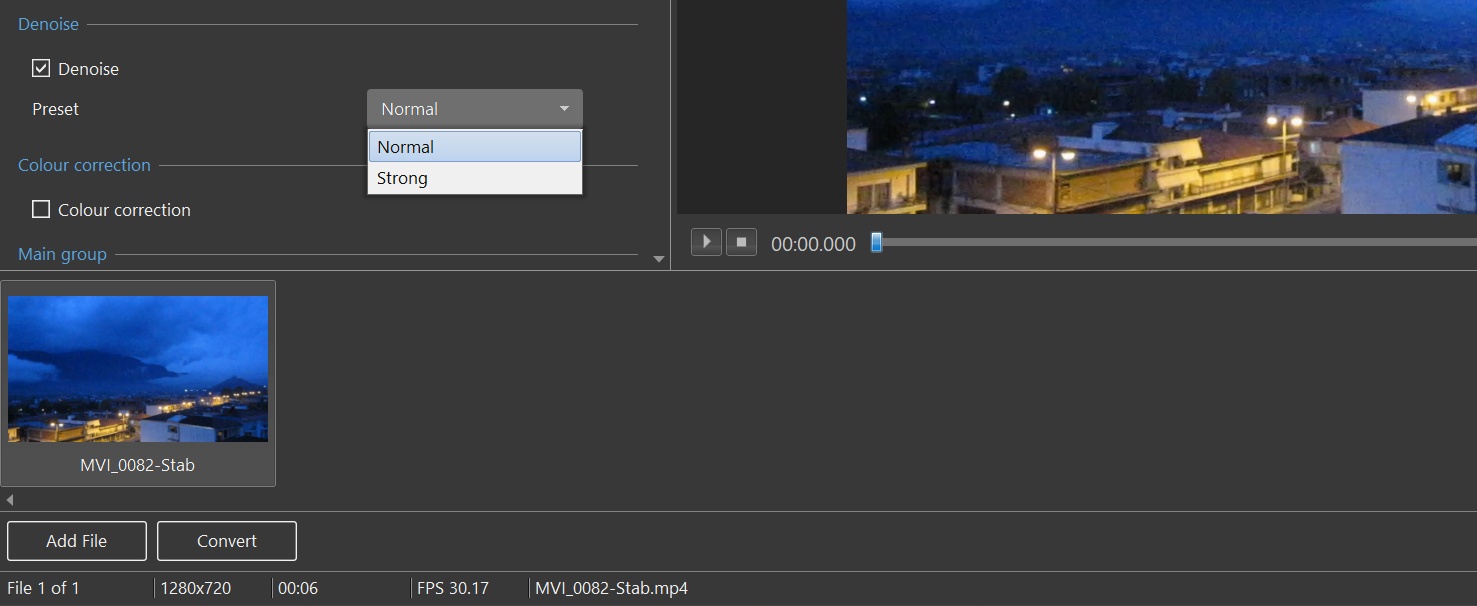
You don't need a heavy editor with pages of sliders. For most clips, a simple utility or video denoiser is enough. For example, PTE Video Optimiser removes pixel noise quickly and keeps detail, with a live preview.
- Click Add File to import one or more video clips.
- Tick Denoise.
- Choose a preset: Normal (start here) or Strong (for very noisy night footage).
- Click Convert and review at 100% zoom. Fine grain should still look natural; if motion looks waxy on Strong, re-export with Normal.
Export settings When you’re happy with the denoise preview, export with the defaults. They’re tuned for everyday use — a balanced mix of quality, resolution, and file size — and they pair well with noise reduction. If you need more control, advanced users can adjust frame rate, resolution, and compression. Use a sensible bitrate so artifacts don’t creep back.
Conclusion
Video noise is common — and with simple noise reduction it’s easy to fix. You can also improve your video further with quick color correction and stabilization. Want a fast, friendly workflow on Windows or macOS? Try PTE Video Optimiser.